Resolving Trezor Hardware Wallet Operational Failures: 2026 Troubleshooting Resource
The landscape of self-custody has shifted dramatically following the exchange insolvencies of the mid-2020s. As more retail investors move assets into cold storage, the technical hurdles of managing a Trezor hardware wallet have become a primary concern for the security-conscious. Navigating the interface between a physical device and a computer requires a firm understanding of the communication protocols that keep your private keys isolated while allowing you to manage your wealth.
Effective management involves more than just unboxing a device; it requires a technical grasp of hardware maintenance, software synchronization via Trezor Suite, and rigorous adherence to security protocols. Most issues—from a Trezor device not connecting to synchronization delays—are rooted in common software-environment conflicts or physical connection bottlenecks. Addressing these effectively requires a methodical approach to the local hardware and software stack.
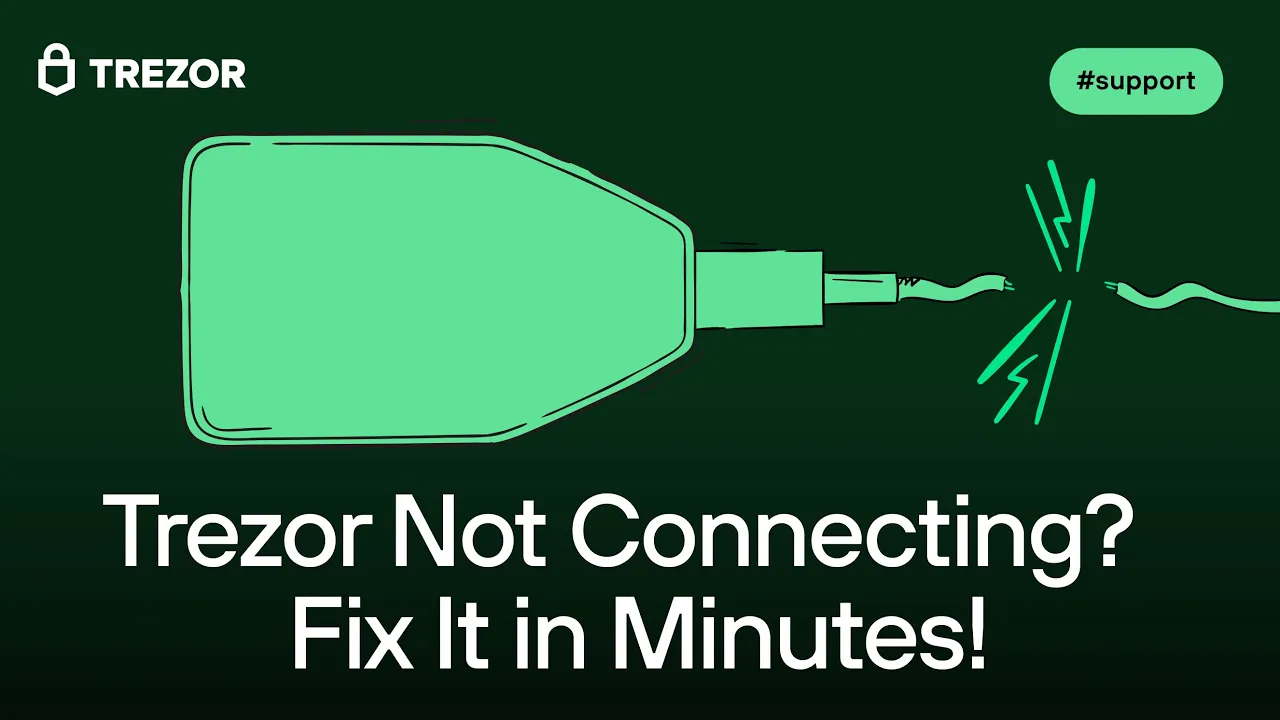
Technical Troubleshooting for the Trezor Device Not Connecting Issue
When your computer fails to recognize the hardware, the breakdown usually occurs in the communication bridge between the USB port and the application. This is particularly common on modern systems like Windows 10/11 and macOS, where enhanced security permissions or driver conflicts can sometimes intercept the device’s handshake.
Hardware and Physical Connectivity Fixes
Before investigating complex software settings, it is essential to rule out physical failures.
Cable Integrity: Not all USB cables are created equal. Many aftermarket cables are designed for power delivery only and lack the internal data lines necessary for a Trezor hardware wallet. Always prioritize the original shielded cable provided by the manufacturer.
Port Directness: Avoid using unpowered USB hubs or keyboard passthrough ports. High-security devices require stable voltage; connecting directly to a primary laptop port or the motherboard’s I/O shield is recommended.
Bootloader Mode Verification: If the device is unresponsive, try entering bootloader mode. For the Model T, this involves sliding your finger across the screen while plugging it in; for the Safe 3 or Model One, specific button combinations are required. If the device is recognized in bootloader mode but not in standard mode, the issue likely points to a firmware state rather than a hardware defect.
OS and Driver Configuration
On Windows 11, a "Device Not Recognized" error in the Device Manager often signals a driver conflict.
Driver Management: Windows may occasionally misidentify the Trezor as a generic HID device. Updating the drivers through the optional updates section in Windows Update or manually reassigning the Trezor USB bridge driver can resolve this.
macOS Permissions: Apple Silicon (M1/M2/M3) users must ensure they have granted permission for the accessory to connect when prompted by the operating system. If the prompt does not appear, checking the "Privacy & Security" settings is a necessary step.
Addressing Trezor Display Not Working and Screen Failures
A blank or flickering screen is a critical failure, as the physical display is your "source of truth" for verifying transaction addresses—a core tenet of hardware security. If you encounter a Trezor display not working, it is often a symptom of insufficient power or a failed boot sequence.
OLED Degradation: OLED screens can dim over years of use. If the screen is active but nearly invisible, this might be a hardware limitation. However, if it is completely black, ensure the device is receiving full power from a high-quality USB port.
Display Reset: Try connecting the device to Trezor Suite on a different computer. If the software recognizes the device, the hardware is functional, and the issue is localized to the display ribbon cable or the screen itself.
Light Test: Use a strong light source to check if the interface is visible beneath the glass. If the pixels are firing but the backlight is dead (common in certain monochromatic models), a replacement may be required through official support channels.
Correcting the Trezor Firmware Update Issue
Firmware updates are vital for maintaining compatibility with new blockchain protocols and security patches. However, a Trezor firmware update issue—such as a progress bar stalling at a specific percentage—can be a common frustration for users.
The Desktop vs. Web Interface: In 2026, Trezor Suite is the primary interface. If the desktop application fails to complete an update, attempting the process via the web interface on Chrome or Brave can bypass local software hangups. These browsers utilize the WebUSB API, which provides a more direct communication path.
Interrupted Installation: If an update is interrupted, the device may show a "Firmware Not Found" warning. This is not a terminal state. Simply reconnect the device in bootloader mode and initiate the process again at Trezor.io/start.
Backup Verification: Before initiating any update, ensure your recovery seed is accessible. While updates are designed to preserve data, a rare interruption can trigger a device wipe as a security precaution.
Resolving Trezor Suite Not Showing Balance
It is a common misconception that funds are stored "on" the device. In reality, the hardware wallet only holds the private keys required to sign transactions. If you find Trezor Suite not showing balance, the problem is usually a synchronization or "Discovery Error."
Backend Synchronization: The application must communicate with blockchain nodes to fetch your transaction history. If these servers are under heavy load or your internet connection is filtered through a strict VPN, the balance may appear as zero.
Passphrase Awareness: The most frequent cause of "missing" funds is the passphrase feature. A single typo in a hidden wallet passphrase creates a completely new, empty wallet. Always verify if you are in a "Standard" or "Hidden" wallet.
Clearing the Cache: Navigating to the settings in Trezor Suite and performing a "Clear Cache" action forces the software to rescan the blockchain. This often resolves discrepancies where recent transactions are not yet reflected in the UI.
Understanding the Role of Trezor Bridge
While Trezor Suite for desktop contains all necessary communication components, users of the web-based interface or certain third-party integrations may still interact with Trezor Bridge.
Trezor Bridge acts as the "translator" between your web browser and the hardware. In 2026, many standalone versions of the bridge have been deprecated in favor of integrated solutions, but if you are using a browser that does not natively support WebUSB, ensuring the trezord process is running in the background is essential for connectivity.
2026 Crypto Environment and Trezor Ecosystem Changes
The year 2026 has seen a significant shift in how users approach self-custody. Following a series of high-profile exchange liquidations, the "Not your keys, not your coins" mantra has moved from a niche slogan to a standard retail practice.
Increased Retail Hardware Wallet Adoption
Data from early 2026 suggests that the hardware wallet market has surpassed previous growth projections. This surge is driven by a sharp pivot toward self-custody among both individual and institutional holders. As a result, users are becoming more technically proficient, moving away from centralized platforms and toward "air-gapped" or offline storage solutions.
Firmware Evolution and New Integrations
Trezor has responded to this surge by releasing frequent updates. Recent firmware versions have introduced native support for an expanded range of blockchain networks, including advanced Layer-2 solutions and new Proof-of-Stake protocols. These updates often require users to visit Trezor.io/start to ensure their environment is fully compatible with the latest security standards.
Safety Concerns and Self-Custody Trends
While hardware wallets mitigate remote hacking risks, they introduce the risk of physical loss or seed mismanagement. Trends in 2026 show an increase in the use of metal backup solutions (titanium or steel plates) to protect recovery phrases from fire and water damage. Additionally, user awareness regarding "address poisoning" scams has increased, leading to more rigorous verification of destination addresses on the device screen itself.
Support, Security, and Physical Intervention
When technical issues exceed basic troubleshooting, physical intervention or official support may be necessary. However, a strict security protocol must always be followed to prevent social engineering attacks.
When Remote Support is Needed
If your device has a persistent hardware defect, such as a broken USB-C port, physical repair is rarely recommended for security reasons. Instead, use your recovery seed to restore your wallet onto a new device. If you must contact support for a warranty claim, ensure you are using the official channels found at Trezor.io/start.
Critical Security Reminders
Security in the crypto space is a binary condition: you are either secure or you are compromised.
Seed Privacy: No legitimate support representative will ever ask for your 12, 18, or 24-word recovery phrase.
PIN and Passphrase: Your PIN and passphrase are for your eyes only. Sharing these with a "technician" gives them full access to your funds.
Physical Confirmation: Always verify transaction details on the device’s physical screen. If the screen does not match what you see on your computer, your computer may be compromised by malware.
Frequently Asked Questions
Why is my Trezor device not connecting?
This is typically caused by a faulty USB cable or a driver conflict. Ensure you are using a data-rated cable and that your browser (Chrome or Brave) has the necessary permissions to access USB devices.
Why is Trezor Suite not showing balance?
A missing balance usually indicates a synchronization error or the use of an incorrect passphrase. Try clearing the app cache or double-checking your "Hidden Wallet" settings.
How long does a firmware update take?
A standard firmware update usually takes between two to five minutes. The time can vary based on your internet connection speed and the specific model of your Trezor hardware wallet.
Is it safe to update Trezor firmware?
Yes, it is essential for security. However, you should always have your recovery seed written down and accessible before starting the update, as there is a small risk the device may be wiped during the process.
Does Trezor work on Windows 11 and macOS?
Yes. Trezor is fully compatible with Windows 10/11 and the latest versions of macOS. Users on these systems should ensure their OS security settings allow for USB communication with the device.
Conclusion: The Future of Cold Storage
As we move further into 2026, the responsibility of asset custody remains firmly with the individual. The Trezor hardware wallet remains an industry standard because it provides a physical barrier between your private keys and a hostile digital world. By understanding the nuances of Trezor Suite, maintaining high-quality connection hardware, and following official procedures at Trezor.io/start, you ensure that your path to financial sovereignty remains unobstructed. Security is not a product you buy; it is a process you maintain through technical diligence and constant awareness.
Secure Asset Migration and Layer-2 Management for Trezor Hardware Wallets (2026)
Migration Protocol: Moving Assets from Software to Hardware Wallets
Transferring assets from a "hot" software wallet (like MetaMask, Exodus, or Coinbase Wallet) to your Trezor hardware wallet is the most significant security upgrade you can perform. This process reassigns ownership of your coins from a private key stored on an internet-connected device to one isolated within your Trezor’s secure element.
Follow this systematic approach to ensure a zero-error migration.
1. The Golden Rule: Generate, Don't Import
The most common mistake is "importing" a software wallet’s 12-word seed phrase into a Trezor. Never do this. * If you import a MetaMask seed into a Trezor, that seed was still born on the internet. If your computer was compromised when you created that MetaMask wallet, the hacker already has the keys.
Correct Action: Set up your Trezor as a New Wallet at Trezor.io/start. This ensures your recovery seed is generated offline and has never touched a digital screen.
2. Prepare Your Environment
Update Software: Ensure Trezor Suite is updated to the latest 2026 version.
Verify Backup: Before sending funds, perform a "Check Backup" in the Suite settings to confirm you have written your new Trezor seed down correctly.
Clear the Area: Ensure no cameras (webcams or phones) are pointed at your screen or the device while you are handling seed phrases.
3. The Migration Execution
Step A: Obtain Your Trezor Receiving Address
Open Trezor Suite and unlock your device.
Navigate to the Accounts tab and select the asset you wish to move (e.g., Ethereum).
Click Receive and then Show full address.
Physical Verification: Compare every character of the address on your computer screen to the address shown on the Trezor hardware wallet screen. They must match exactly.
Step B: Perform a "Dust" Test Transfer
Never move your entire portfolio in one go.
Go to your software wallet (MetaMask/Exodus).
Click Send and paste your Trezor receiving address.
Send a small "test" amount (the "dust").
Wait for the transaction to receive at least 2–3 confirmations on the blockchain. Once the balance appears in Trezor Suite, you have confirmed the bridge is safe.
Step C: Move the Remaining Balance
Once the test is successful, send the remaining assets.
Note that for Ethereum and EVM chains, you will need a small amount of native gas (ETH) left in your software wallet to pay for the outgoing transaction fee.
4. Special Case: Exodus-to-Trezor Integration
If you are moving funds from the native Exodus wallet to a Trezor, you can use the built-in Exodus support for Trezor:
Connect your Trezor to the Exodus desktop app.
A "Trezor Portfolio" will appear alongside your "Exodus Portfolio."
Use the Transfer button within Exodus to move funds internally from the software side to the hardware side. This is still a blockchain transaction and will incur standard network fees.
5. Post-Migration Security
Delete the Hot Wallet: Once the balance in your software wallet is zero, you can delete that specific account or the extension.
Label Your Seeds: Clearly mark your Trezor recovery seed as "Cold Storage" and keep it physically separate from any old software wallet backups to avoid confusion during a future recovery.
Essential Verification Checklist: Managing ERC-20 Tokens in Trezor Suite
Migrating ERC-20 tokens—assets like USDT, LINK, or SHIB that reside on the Ethereum blockchain—requires a nuanced understanding of how Trezor Suite categorizes assets. Because these tokens do not have their own independent blockchains, they share your Ethereum receiving address.
To prevent "ghost balances" or the loss of assets during your migration, run through this technical checklist before initiating any transfer.
1. Network Matching (The "Mainnet" Rule)
The most critical error in token migration is selecting the wrong network at the withdrawal stage of an exchange.
Native Support: Trezor Suite natively displays ERC-20 tokens sent via the Ethereum Mainnet.
The L2/EVM Trap: If you send "Ethereum tokens" via Binance Smart Chain (BEP-20), Polygon, or Arbitrum, they will not appear in your standard Trezor Suite balance. While the assets are safe on the blockchain, you would be forced to use a third-party interface like MetaMask to access them.
Verification: Always ensure the "Network" selected on your sending platform is Ethereum (ERC-20/Mainnet).
2. Address Consistency Check
Shared Infrastructure: Confirm that your Trezor Ethereum address is the destination. You do not need a "USDT address" or a "LINK address"; any ERC-20 token sent to your Trezor ETH address will be automatically sorted into the "Tokens" tab within that account.
Avoid Contract Addresses: Never send funds to the token's "Contract Address" (the code that created the token). Funds sent there are generally unrecoverable. Only send to your personal receiving address verified on your Trezor hardware wallet screen.
3. Verify Token Recognition in Trezor Suite
While Trezor supports thousands of tokens, the Trezor Suite interface may not have a "price feed" or a recognized logo for obscure or very new assets.
Automatic Discovery: Most major tokens will appear automatically under the Accounts > Ethereum > Tokens tab once the transaction is confirmed.
Manual Addition: If a token is confirmed on Etherscan but missing from the UI, you can manually add it by clicking the three dots (...) in the Tokens section and pasting the Contract Address.
Etherscan Verification: If in doubt, paste your Trezor ETH address into Etherscan.io. If the tokens show up there under "Token Holdings," your assets are secure, even if the Suite's display is lagging.
4. The Gas Fee Requirement (Outgoing Only)
This is a post-migration necessity.
To move or sell your ERC-20 tokens out of your Trezor later, you must have a small amount of Ethereum (ETH) in that same account to pay for "Gas."
Checklist Item: Ensure you migrate at least $20–$50 worth of ETH along with your tokens to ensure you aren't "stranded" when you want to trade in the future.
5. Security: Watch Out for "Dusting" Tokens
Once you migrate your assets, you may notice small amounts of unknown tokens appearing in your Trezor Suite.
Do Not Interact: These are often "dusting" attacks—malicious tokens designed to bait you into visiting a phishing website to "claim" a prize.
Action: Simply ignore them. As long as you do not attempt to swap or move these unknown tokens, they cannot affect your primary holdings.
Technical Integration: Using Trezor with MetaMask for Layer-2 Networks (2026)
By 2026, Ethereum’s scaling roadmap has solidified Layer-2 (L2) networks like Polygon, Arbitrum, and Optimism as the primary venues for retail DeFi activity. While Trezor Suite provides native visibility for some of these chains, connecting your Trezor hardware wallet to MetaMask remains the most versatile method for interacting with the full spectrum of dApps across the Ethereum Virtual Machine (EVM) ecosystem.
This integration allows you to use the familiar MetaMask interface to navigate complex dApps while requiring a physical "Press to Confirm" on your Trezor for every transaction, ensuring your private keys never touch your browser.
1. Establishing the Hardware-to-Browser Link
Before you can interact with L2s, you must import your Trezor's public keys into the MetaMask extension on Chrome or Brave.
The Connection Sequence
Unlock Your Trezor: Ensure your device is plugged in and you have entered your PIN.
MetaMask Account Menu: Open the MetaMask extension, click the account icon (top right), and select "Add account or hardware wallet."
Select Trezor: Choose Trezor from the list and click Continue.
Trezor Connect Handshake: A new browser tab from
connect.trezor.iowill appear.Click "Allow once for this session."
Click "Export" to share your public keys (this is safe; it does not share your private seed).
Unlock the Account: If you use a passphrase (Hidden Wallet), enter it on your Trezor device when prompted. Select the specific Ethereum account you want to use and click Unlock.
Note: You are not "sending" your wallet to MetaMask. You are simply giving MetaMask a "window" to see your Trezor's addresses. MetaMask can see your balance, but it cannot spend a single wei without your Trezor being physically connected to sign the request.
2. Adding Layer-2 Networks to MetaMask
MetaMask is set to the Ethereum Mainnet by default. To use L2s, you must add their specific network configurations.
Automatic Network Addition (Recommended)
Visit a trusted directory like Chainlist.org.
Search for "Polygon Mainnet" or "Arbitrum One."
Click "Connect Wallet" and then "Add to MetaMask."
A MetaMask pop-up will ask for approval to add the network. Verify that the Chain ID matches the official documentation (e.g.,
137for Polygon,42161for Arbitrum).
Manual Network Configuration
If you prefer manual entry on Windows 11 or macOS, go to MetaMask Settings > Networks > Add a network and enter the RPC details provided by the network’s official support page.
3. The L2 Transaction Workflow
Once the network is added, the experience of using a dApp on Arbitrum or Polygon is nearly identical to using Mainnet, but significantly faster and cheaper.
Switch Networks: In MetaMask, toggle the network dropdown at the top to your desired L2 (e.g., Arbitrum).
Connect to dApp: Visit the dApp (like GMX or Uniswap) and click Connect. Ensure the dApp recognizes your "Hardware" account (it will be labeled "TREZOR 1" in MetaMask).
Sign the Request: When you perform an action (like a swap), MetaMask will generate a transaction and send it to your Trezor.
Physical Verification: Your Trezor screen will wake up and show the transaction details.
Crucial Step: On L2s, the "To" address on your Trezor screen may be a smart contract address rather than a personal wallet. Always verify the contract you are interacting with.
Confirm on Device: Hold the physical button or follow the touchscreen prompt on your Trezor to broadcast the transaction.
4. Technical Troubleshooting for L2 Interactions
Interactions on Layer-2 networks can occasionally trigger specific errors due to the way different nodes handle data.
"Transaction Underpriced" Error: L2 fees are very low, but they fluctuate rapidly. If your transaction stalls, use the "Speed Up" feature in MetaMask to increase the gas price slightly.
Trezor Not Detected during Signing: If MetaMask hangs while waiting for your Trezor to sign an L2 transaction:
Ensure no other tabs (like Trezor Suite Web) are trying to communicate with the device.
On macOS, ensure you haven't recently updated your OS without re-granting USB permissions to the browser.
Balance Mismatch: If you see your L2 balance on a block explorer (like Arbiscan or Polygonscan) but not in MetaMask, it is likely a local RPC error. Switching to a different RPC URL (found on Chainlist) usually fixes the display immediately.
5. Security Protocol for 2026 L2 Management
While L2s offer efficiency, they carry the same risks of malicious smart contracts as the Mainnet.
Gas in Native Tokens: Remember that Arbitrum and Optimism require ETH for gas, while Polygon (PoS) requires POL (formerly MATIC). You must have a small amount of the native token on that specific L2 network to pay for transactions.
Revoke Permissions: If you connect your Trezor to an L2 dApp for a one-time swap, use a tool like Revoke.cash to cancel any "Unlimited Allowance" permissions once you are finished.
Hidden Wallets (Passphrases): If you use a passphrase, remember that your "L2 Account 1" for Passphrase A is different from "L2 Account 1" for Passphrase B. Ensure you are entering the exact same passphrase every time to find your funds.
2026 Gas Fee Structure: Ethereum Mainnet vs. Layer-2 Networks
By early 2026, the technical landscape of Ethereum has reached a state of "structural efficiency." Following the Fusaka and PeerDAS upgrades in late 2025, the cost gap between the Layer-1 (L1) settlement layer and Layer-2 (L2) execution environments has stabilized.
For a user migrating assets to a Trezor hardware wallet, understanding these fees is essential for timing your transfers and managing your long-term storage costs.
1. Comparative Cost Analysis (January 2026 Estimates)
The following table reflects average transaction costs during standard network conditions. Prices are denominated in USD, assuming an ETH price range of $2,800 – $3,300.
Transaction Type
Ethereum Mainnet (L1)
Arbitrum / Optimism (L2)
Polygon PoS (Sidechain)
Simple ETH Transfer
$0.01 – $0.15
< $0.01
< $0.01
ERC-20 Token Swap
$0.30 – $0.80
$0.03 – $0.10
$0.01 – $0.05
NFT Mint / Transfer
$0.50 – $1.20
$0.05 – $0.15
$0.02 – $0.08
Bridge to L1/L2
$2.00 – $10.00
$0.50 – $2.00
$0.10 – $1.00
Technical Insight: The "Fusaka" upgrade successfully increased the "blob" capacity (dedicated data space for L2s), which has permanently decoupled L2 fees from Mainnet congestion. Even if the Mainnet becomes busy, L2 fees typically remain sub-cent.
2. Key Differences in Fee Mechanics
Ethereum Mainnet (L1)
The "Premium" Layer: Mainnet is now viewed as a high-security settlement layer. While basic transfers have dropped to near-record lows ($0.01–$0.15), complex smart contract interactions still command a premium because they require the most decentralized validation.
Fee Burn: A portion of every L1 transaction is "burned" (destroyed), which can make ETH deflationary during high-volume periods.
Layer-2 Rollups (Arbitrum, Optimism, Base)
Batching Efficiency: These networks bundle thousands of transactions into a single "blob" and post it to Ethereum. In 2026, the cost of these blobs has plummeted, allowing rollups to pass those savings directly to you.
L2 Gas Currency: Arbitrum and Optimism still use ETH to pay for gas. Even though you are on a different network, you need a small amount of "L2 ETH" in your Trezor account to move funds.
Polygon (PoS & zkEVM)
Dual Structure: Polygon PoS uses POL (formerly MATIC) for gas. It is a sidechain, meaning it operates its own consensus. Polygon zkEVM, however, uses ZK-proofs for higher security and typically uses ETH or POL depending on the specific implementation.
3. The "Bridging" Cost: Moving Funds to your Trezor
When you migrate funds from an exchange to your hardware wallet, you encounter a "withdrawal fee" or a "bridge fee."
Direct Withdrawal: Most major exchanges now allow you to withdraw directly to an L2. This is the cheapest method (usually < $1.00).
Native Bridges: Using the official Ethereum-to-Arbitrum bridge is the most "secure" but also the most expensive ($5–$15), as it involves a complex smart contract interaction on the Mainnet.
Third-Party Bridges: Tools like Across or Hop Protocol utilize liquidity pools to move your funds faster and cheaper ($1–$3).
4. Strategic Recommendations for 2026 Migration
Low-Value Tokens (< $500): Keep these on an L2 like Arbitrum or Polygon. Moving them to the Mainnet might cost more in bridge fees than is justifiable for the security increase.
High-Value Assets (> $5,000): Migrate these to the Ethereum Mainnet. While L2s are highly secure, the Mainnet provides the ultimate "Finality" and is the least dependent on centralized sequencers.
Timing your Transfers: Even with low fees, the Windows 11 and macOS versions of Trezor Suite show real-time gas trackers. Aim for weekends or late-night (UTC) to catch the absolute lowest rates.
Custom RPC Setup: Optimizing Performance and Cost for Trezor Users
In the 2026 Web3 environment, the default RPC (Remote Procedure Call) nodes provided by wallet extensions can occasionally experience "tail latency"—brief spikes in response time during high-traffic events. For a Trezor hardware wallet user, this might result in a "Transaction Failed" message or an incorrect balance display in MetaMask.
Switching to a Custom RPC allows you to bypass public congestion, access private mempools (which protect you from MEV front-running bots), and ensure more accurate gas estimation.
1. Why Use a Custom RPC with Trezor?
MEV Protection: Custom providers like dRPC or Flashbots can route your transaction directly to miners/builders, preventing bots from "sandwiching" your trades and giving you a worse price.
Accuracy: Public nodes often lag behind the actual state of the blockchain. A custom endpoint from a provider like Alchemy or Quicknode ensures your Trezor is signing transactions based on the most recent block data.
Privacy: Public RPCs can log your IP address alongside your wallet address. High-privacy RPCs offer "No-Log" policies to maintain your anonymity.
2. Setting Up a Custom RPC in MetaMask
Follow these steps to replace a default network (like Arbitrum) with a high-performance custom endpoint.
Step A: Generate Your Endpoint
Visit a provider such as Alchemy.com or Quicknode.com and create a free account.
Select "Create New App" or "Endpoints."
Choose your network (e.g., Arbitrum One).
Copy the HTTP Provider URL provided (it will look like https://arb-mainnet.g.alchemy.com/v2/your-unique-key).
Step B: Configure MetaMask
Open MetaMask and click the Network Selector (top left).
Click Add Network and then Add a network manually at the bottom of the list.
Enter the technical details for the network. Here are the 2026 standards for the most popular L2s:
Field
Arbitrum One
Polygon Mainnet
Optimism
Network Name
Arbitrum (Private)
Polygon (Private)
Optimism (Private)
New RPC URL
Paste your unique URL
Paste your unique URL
Paste your unique URL
Chain ID
42161
137
10
Currency Symbol
ETH
POL
ETH
Block Explorer
https://arbiscan.io
https://polygonscan.com
https://optimistic.etherscan.io
Click Save.
3. Verifying the Connection with your Trezor
Once the custom network is active:
Connect your Trezor hardware wallet and select the account in MetaMask.
Perform a simple "sign" action (such as logging into a dApp).
If the handshake is successful, you will notice that the "Waiting for Confirmation" stage in MetaMask is nearly instantaneous compared to the default public nodes.
4. Troubleshooting "Internal JSON-RPC" Errors
If you receive a JSON-RPC error after switching to a custom provider:
Check the API Key: Ensure your provider account hasn't reached its monthly "Credit" or "Request Unit" limit. Free tiers in 2026 are generous but not infinite.
Browser Permissions: On macOS, ensure that your browser's "Content Blockers" aren't preventing the extension from communicating with your custom RPC domain.
Revert to Default: If a custom node goes offline, you can always switch back to the "Default" network in the MetaMask dropdown to maintain access to your funds.
5. Summary Checklist for 2026 RPC Management
[ ] Redundancy: Set up at least two custom RPCs (e.g., one from Alchemy and one from dRPC) so you have a backup if one provider experiences downtime.
[ ] Privacy Settings: In MetaMask Settings > Security & Privacy, ensure "Batch RPC Requests" is toggled ON to reduce the number of calls your browser makes, further improving speed.
[ ] Physical Check: Always remember that no matter how fast your RPC is, the final security bottleneck is you. Always verify the destination address on your Trezor's physical screen, as a compromised RPC could theoretically display a "fake" address on your computer.
Conclusion: Achieving Long-Term Financial Sovereignty
As we navigate the landscape of 2026, the transition from software-based "hot" wallets to the hardware-isolated environment of a Trezor hardware wallet remains the single most effective defense against the evolving threats of the digital age. By implementing the migration protocols and Layer-2 optimization strategies outlined in this resource, you have effectively moved your digital wealth from a "permissioned" state of vulnerability to a "sovereign" state of cold storage.
True security, however, is not a destination but a continuous practice. While your private keys are now shielded by high-grade silicon, your primary responsibility shifts to the protection of your physical environment and your recovery seed. Adhering to the "no-digital-footprint" rule for your seed phrase and consistently verifying transactions on your Trezor's physical screen are the habits that define a successful long-term investor.
As the Ethereum ecosystem continues to scale through advanced Layer-2 rollups and Zero-Knowledge proofs, your Trezor will serve as your secure anchor. Whether you are performing high-volume swaps on Arbitrum or settling significant assets on the Ethereum Mainnet, the principles of hardware verification remain your ultimate safeguard. Embrace the complexity of 2026 with the confidence that your assets are not just stored, but are truly yours.
Final Security Checklist for Trezor Users
[ ] Physical Seed Protection: Your recovery phrase is stored on metal or fireproof paper, never in a cloud or photo.
[ ] Firmware Integrity: You only perform updates through the official Trezor Suite or Trezor.io/start.
[ ] Network Discipline: You always verify the Chain ID and Gas fees before signing any L2 transaction.
[ ] Zero Trust Policy: You never share your PIN, Passphrase, or Seed with anyone claiming to be "support."